aevaSlicer User’s Guide
aevaSlicer Home module
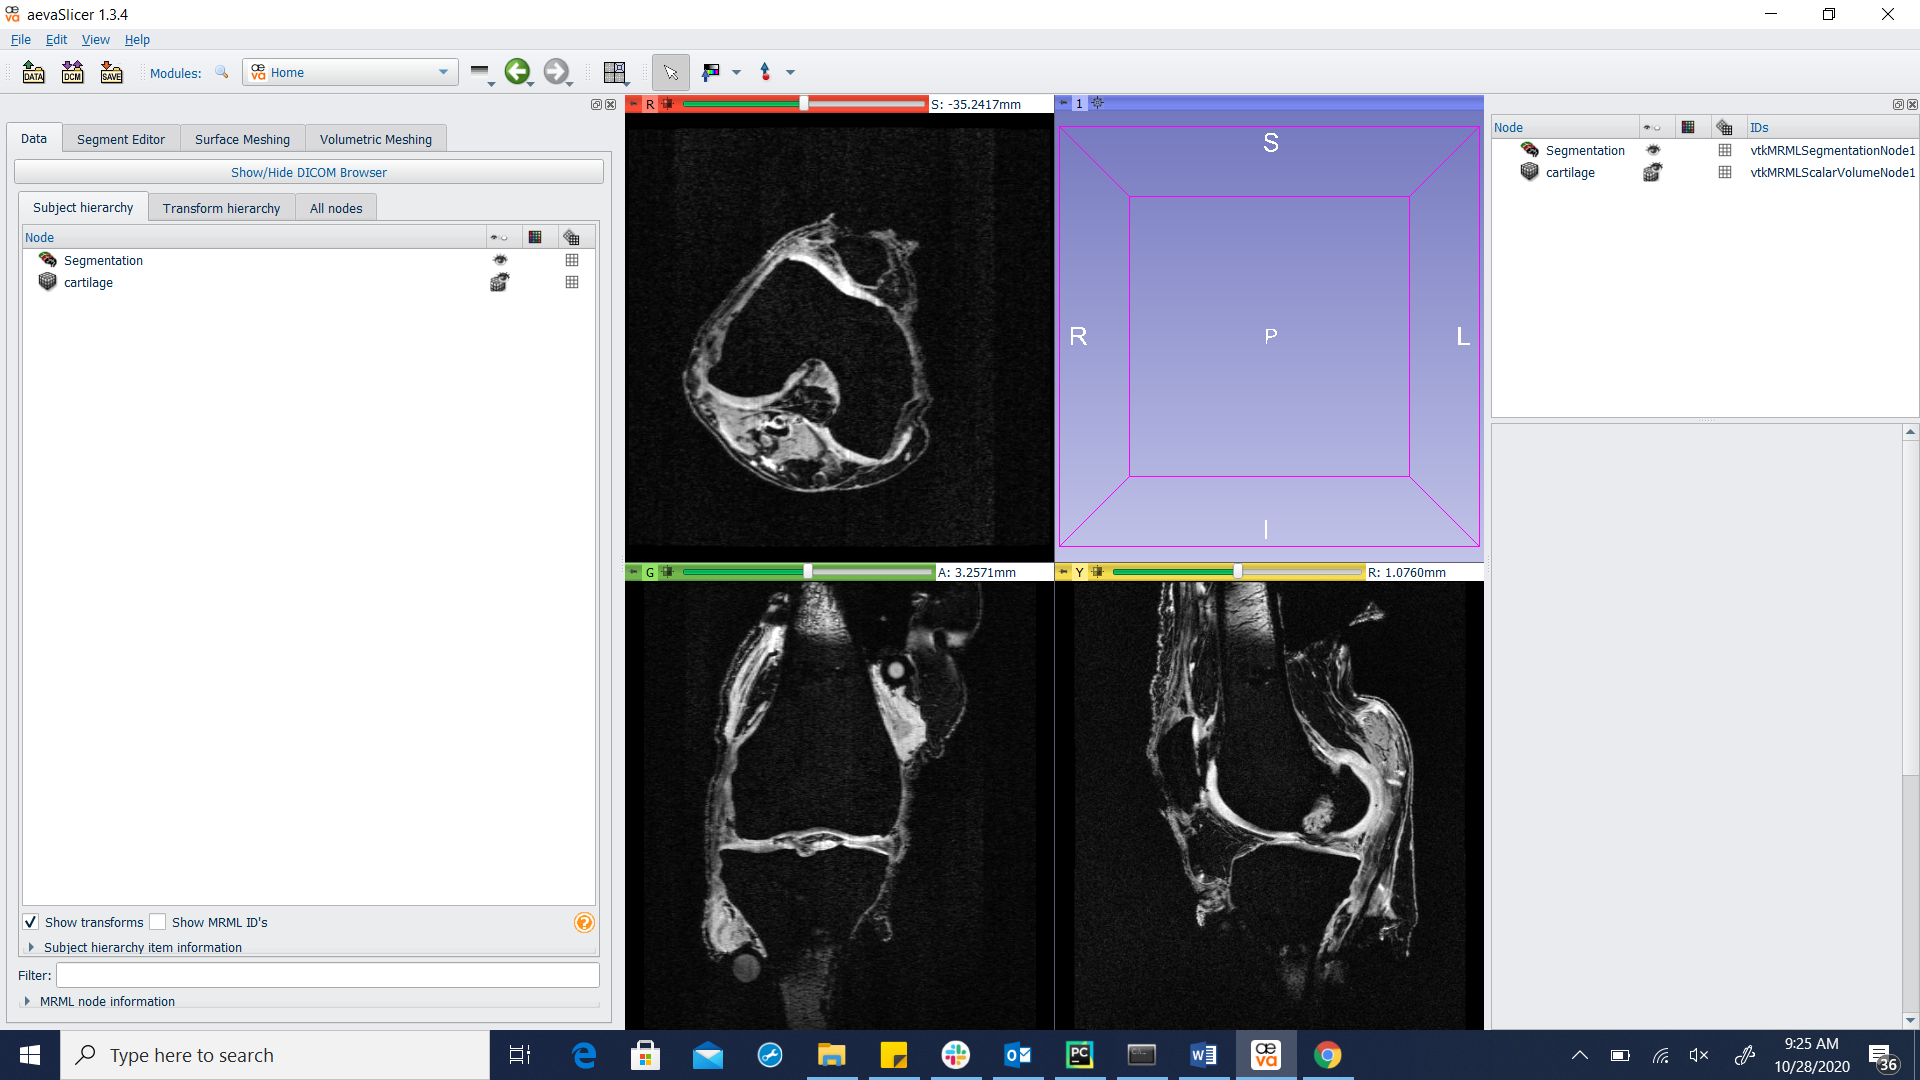
The aevaSlicer Home module is designed to provide quick access to segmentation, surface meshing, and volumetic meshing tools in one place. Using the tools provided in the Home module, users can go from image to volumetic mesh with intermediate outputs of segmentations and surface volumes. From the Modules drop down menu, select the Home module. The Home module provides quick access to the Data, Segment Editor, Surface Meshing, and Volumetric Meshing modules on the left side of the screen. The subject hierarchy is also displayed on the right side of the screen, for quick access to visibility and display options while working in any of the Home modules.
Segment Editor
Refer to 3D slicer documentation for details about the Segment Editor features.
Surface Meshing
The Surface Meshing module provides tools for generating triangulated surface meshes from segmentations, as well as smoothing, re-meshing, and reconstruction tools to be used on existing triangulated surface meshes.
Generating a surface mesh from segmentation
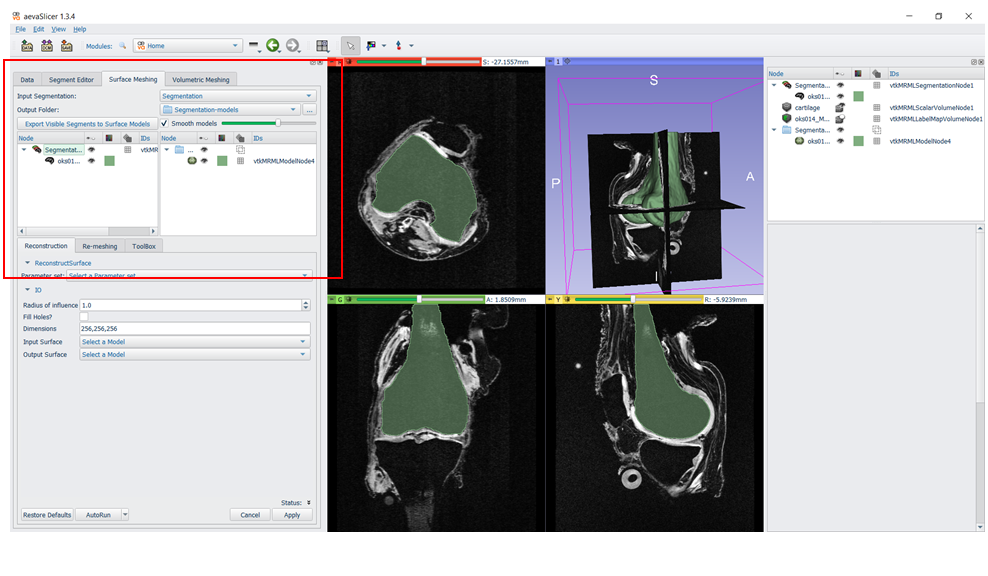
Load the labelmap(s) of interest into the Segment Editor. Select the Input Segmentation, and the output folder for the surface meshes. Use the “smooth models” checkbox and slider for automatic smoothing of the segmentations when generating the triangulated surface mesh. Select “Export Visible Segments to Surface Models” to generate the surface meshes. Toggle visibility of the segments to control which segments a surface mesh is generated for.
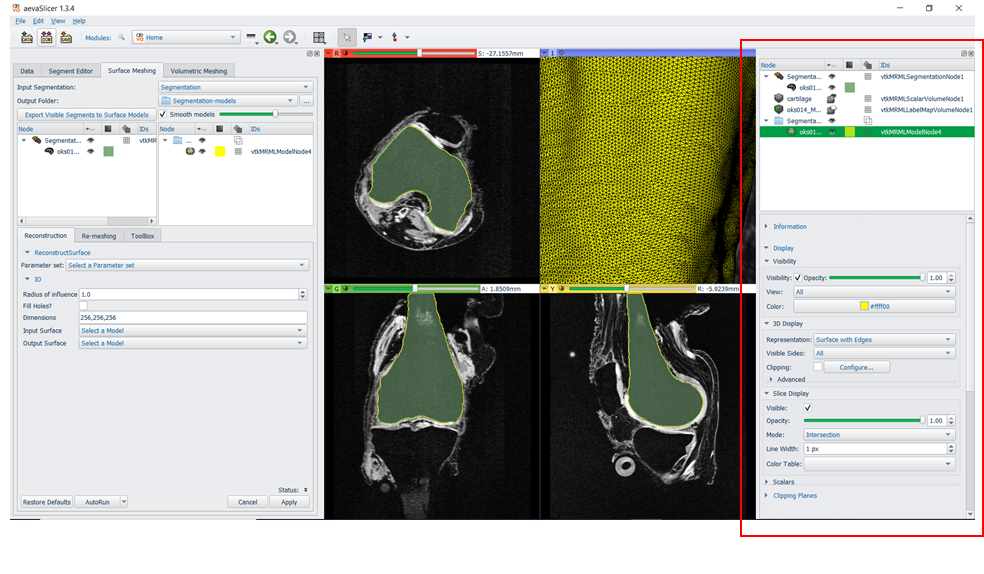
The generated mesh will appear in the data panel, which can be accessed on the right hand side of the screen, in the subject hierarchy. Selecting the mesh from the list will open display options below. Users may change the color, 3D display (ex: Surface with edges), toggle visibility in the slices, etc.
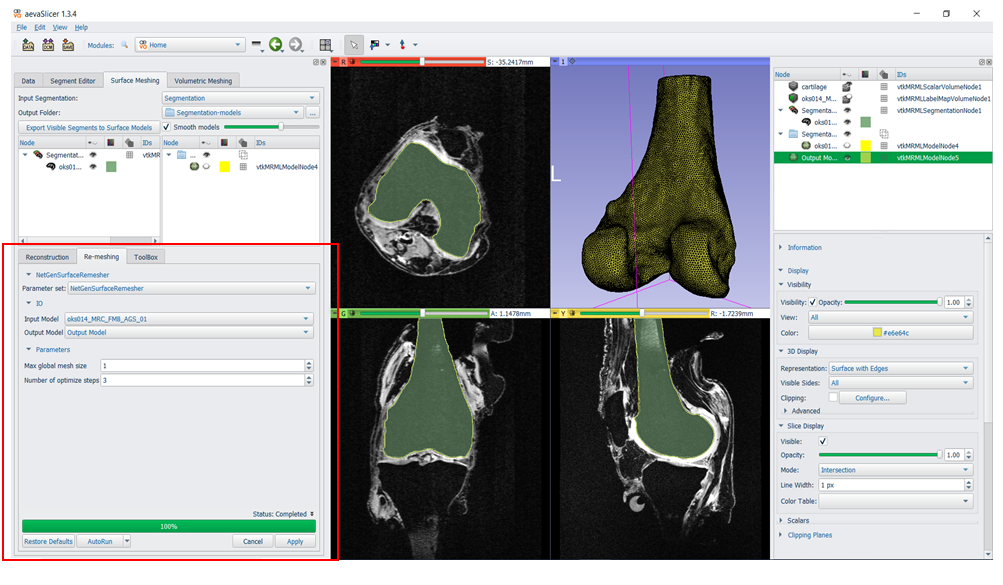
Surface Mesh tools
On the lower left side the user can find tools for processing the surface mesh. The Reconstruction tab allows for reconstruction of the triangulated mesh. The Re-Meshing tab provides a tool for changing the density of the surface mesh, using a NetGen algorithm. The toolbox tab includes smoothing, decimation, and other processing tools. Select the tool of interest, select an input model, and output node. Adjust the settings and select apply. The processed mesh will appear in the subject hierarchy, under the selected output node.
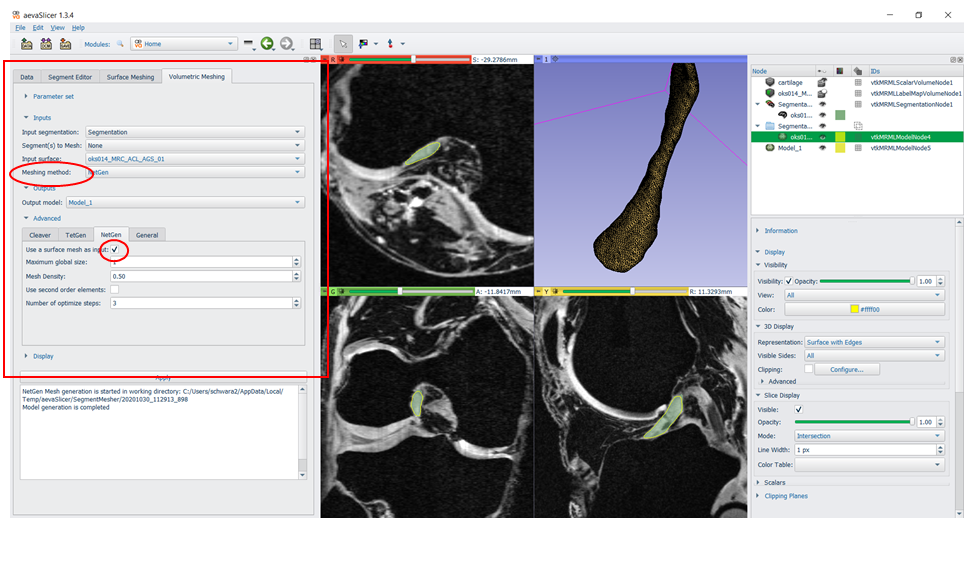
Volumetric Meshing
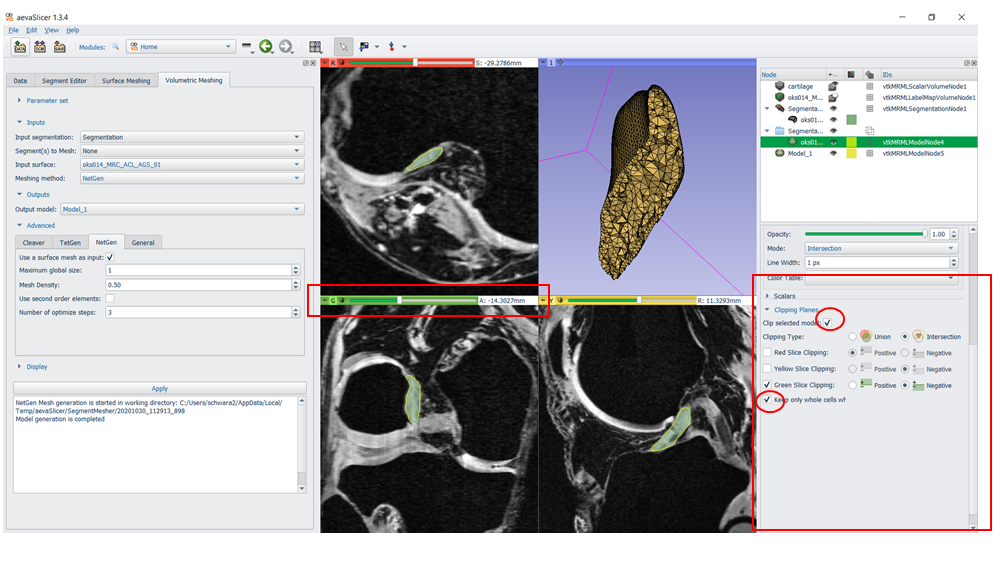
The Volumetric Meshing module provides a tool for creating an internal mesh from a segmentation or a surface mesh. Several meshing algorithms are available. For creating an internal mesh from an existing surface mesh, begin by selecting the Meshing method (TetGen or NetGen) from the drop down menu. Under Advanced, select the tab for the meshing method, and select the “use surface mesh as input” check box. This will release the Input Surface drop down menu above. Choose the Input surface, and the node for the output model. Adjust the settings, and select Apply
To display the internal mesh, select the mesh from the subject hierarchy on the right hand side of the screen. Under Clipping Planes, select the “clip selected model” check box. Choose the slice along which to clip, and select the “keep only whole cells whole” check box. Moving the slider on top of the selected clipping slice will move the clipping plane along the mesh as well.